The Need.
We are your stereotypical 30-something millennials who "live at home" to save money. Even though we have a house we could theoretically move into at this point, we've opted to instead save more money, rent it out, and wait until my parents kick us out of their house basically. Now that we have been fortunate enough to provide a grandchild, I doubt our eviction will happen any time soon. #chessnotcheckers
My parents' house is a really cool home built and decorated in the 1980s. The previous owners designed and furnished everything. It has not been updated aesthetically since the 80s.
Our current freeloading domain is the upstairs and it has technically four guest bedrooms and one bath. Oftentimes we will have families come visit (filling all four rooms up) so sharing one bathroom can be a bit challenging. One of the larger bedrooms was going to become George's nursery too so guest space was becoming limited. We also knew once George arrived, we would have more frequent and longer term guests. My parents, when they bought the house back in 2008, always wanted to convert a postage stamp-sized guest bedroom and adjacent unfinished attic space into a larger guest suite with full bath. So, with George's impending debut we all decided to take this challenge on.
The goal was to start in early October (once we finished / listed a flip) and have it completed by end of December. I naively thought with a baby on the way we would have the drive to finish in a timely manner because who wants to renovate where you live, especially with a newborn? Well, we had the motivation, but of course there were a couple minor starts and stops along the way. Mostly due to the fact that subcontractors didn't want to work around Thanksgiving and Christmas?? ODD! (Don't forget to always consider holidays when coming up with timelines—not everyone is a psychopath making cuts for hardwoods 8 months pregnant around Christmas!)
The Plan.
The existing tiny guest bedroom only had the space to house one twin bed. We previously used it as a "gym" when it was not needed as a guest room. I can count the amount of times we worked out in this room on one finger.

Our gym aka the room that stored gym equipment.
The skylights in this guest room are very interesting and unique. They provided light to both this room and the garage below. We knew they would sadly have to be eliminated if we were going to add a full bath. The door in the back of the room leads to the unfinished attic space. Both the door and wall would need to be demoed to combine the attic space and little bedroom into one large guest suite.
The attic space next to the room would obviously not only need to be a finished space for a bed, but also would require a large window for egress.

Attic wall that required a window.
In our past flips, we did not need to consult an architect or designer to figure out the best layout as those updates were very straightforward to us. With this project however, we knew we had to hire a professional in order to make this space fully and appropriately functional.

With an architect, we determined that we would need to steal space from the other adjacent bathroom upstairs (more specifically its linen closet) in order to have more square footage to create a full bath for the new guest suite. We would also need to eliminate the existing skylights, frame out flooring, etc, so that there was more living space since the new bathroom would be taking up quite a bit of it. And since the skylights had originally provided light to the garage, we had to work with an electrician to add new lights down there as well.
Because we lost the existing bathroom's linen closet, we then converted the little guest bedroom's into one. That meant we had to close up the closet opening in the old guest room and create a new one facing out into the adjacent hallway for everyone to be able to access. And since the guest suite is on a different level, we had to frame up a new closet floor to be level with the new hallway access. Kind of confusing to explain, but I guess you can understand how this was not a very straightforward process of just plunking a bathroom into a space, throwing a bed in there too, and calling it a day.

The new linen closet opening. As you can see we had to frame out the closet floor so that it would be level with where our dogs are standing.
As previously mentioned, a window also had to be added for egress. The exterior is brick so we hired a professional mason to cut an opening in the brick veneer and patch it back once we installed the new window. We always hire professionals when we think things are even slightly out of our wheelhouse. While we could go the popular DIY route these days and watch YouTube videos on how to do it, it saves a lot of time and heartache to have it done by a skilled mason with the appropriate crew, tools, and experience. Totally worth the extra money spent.
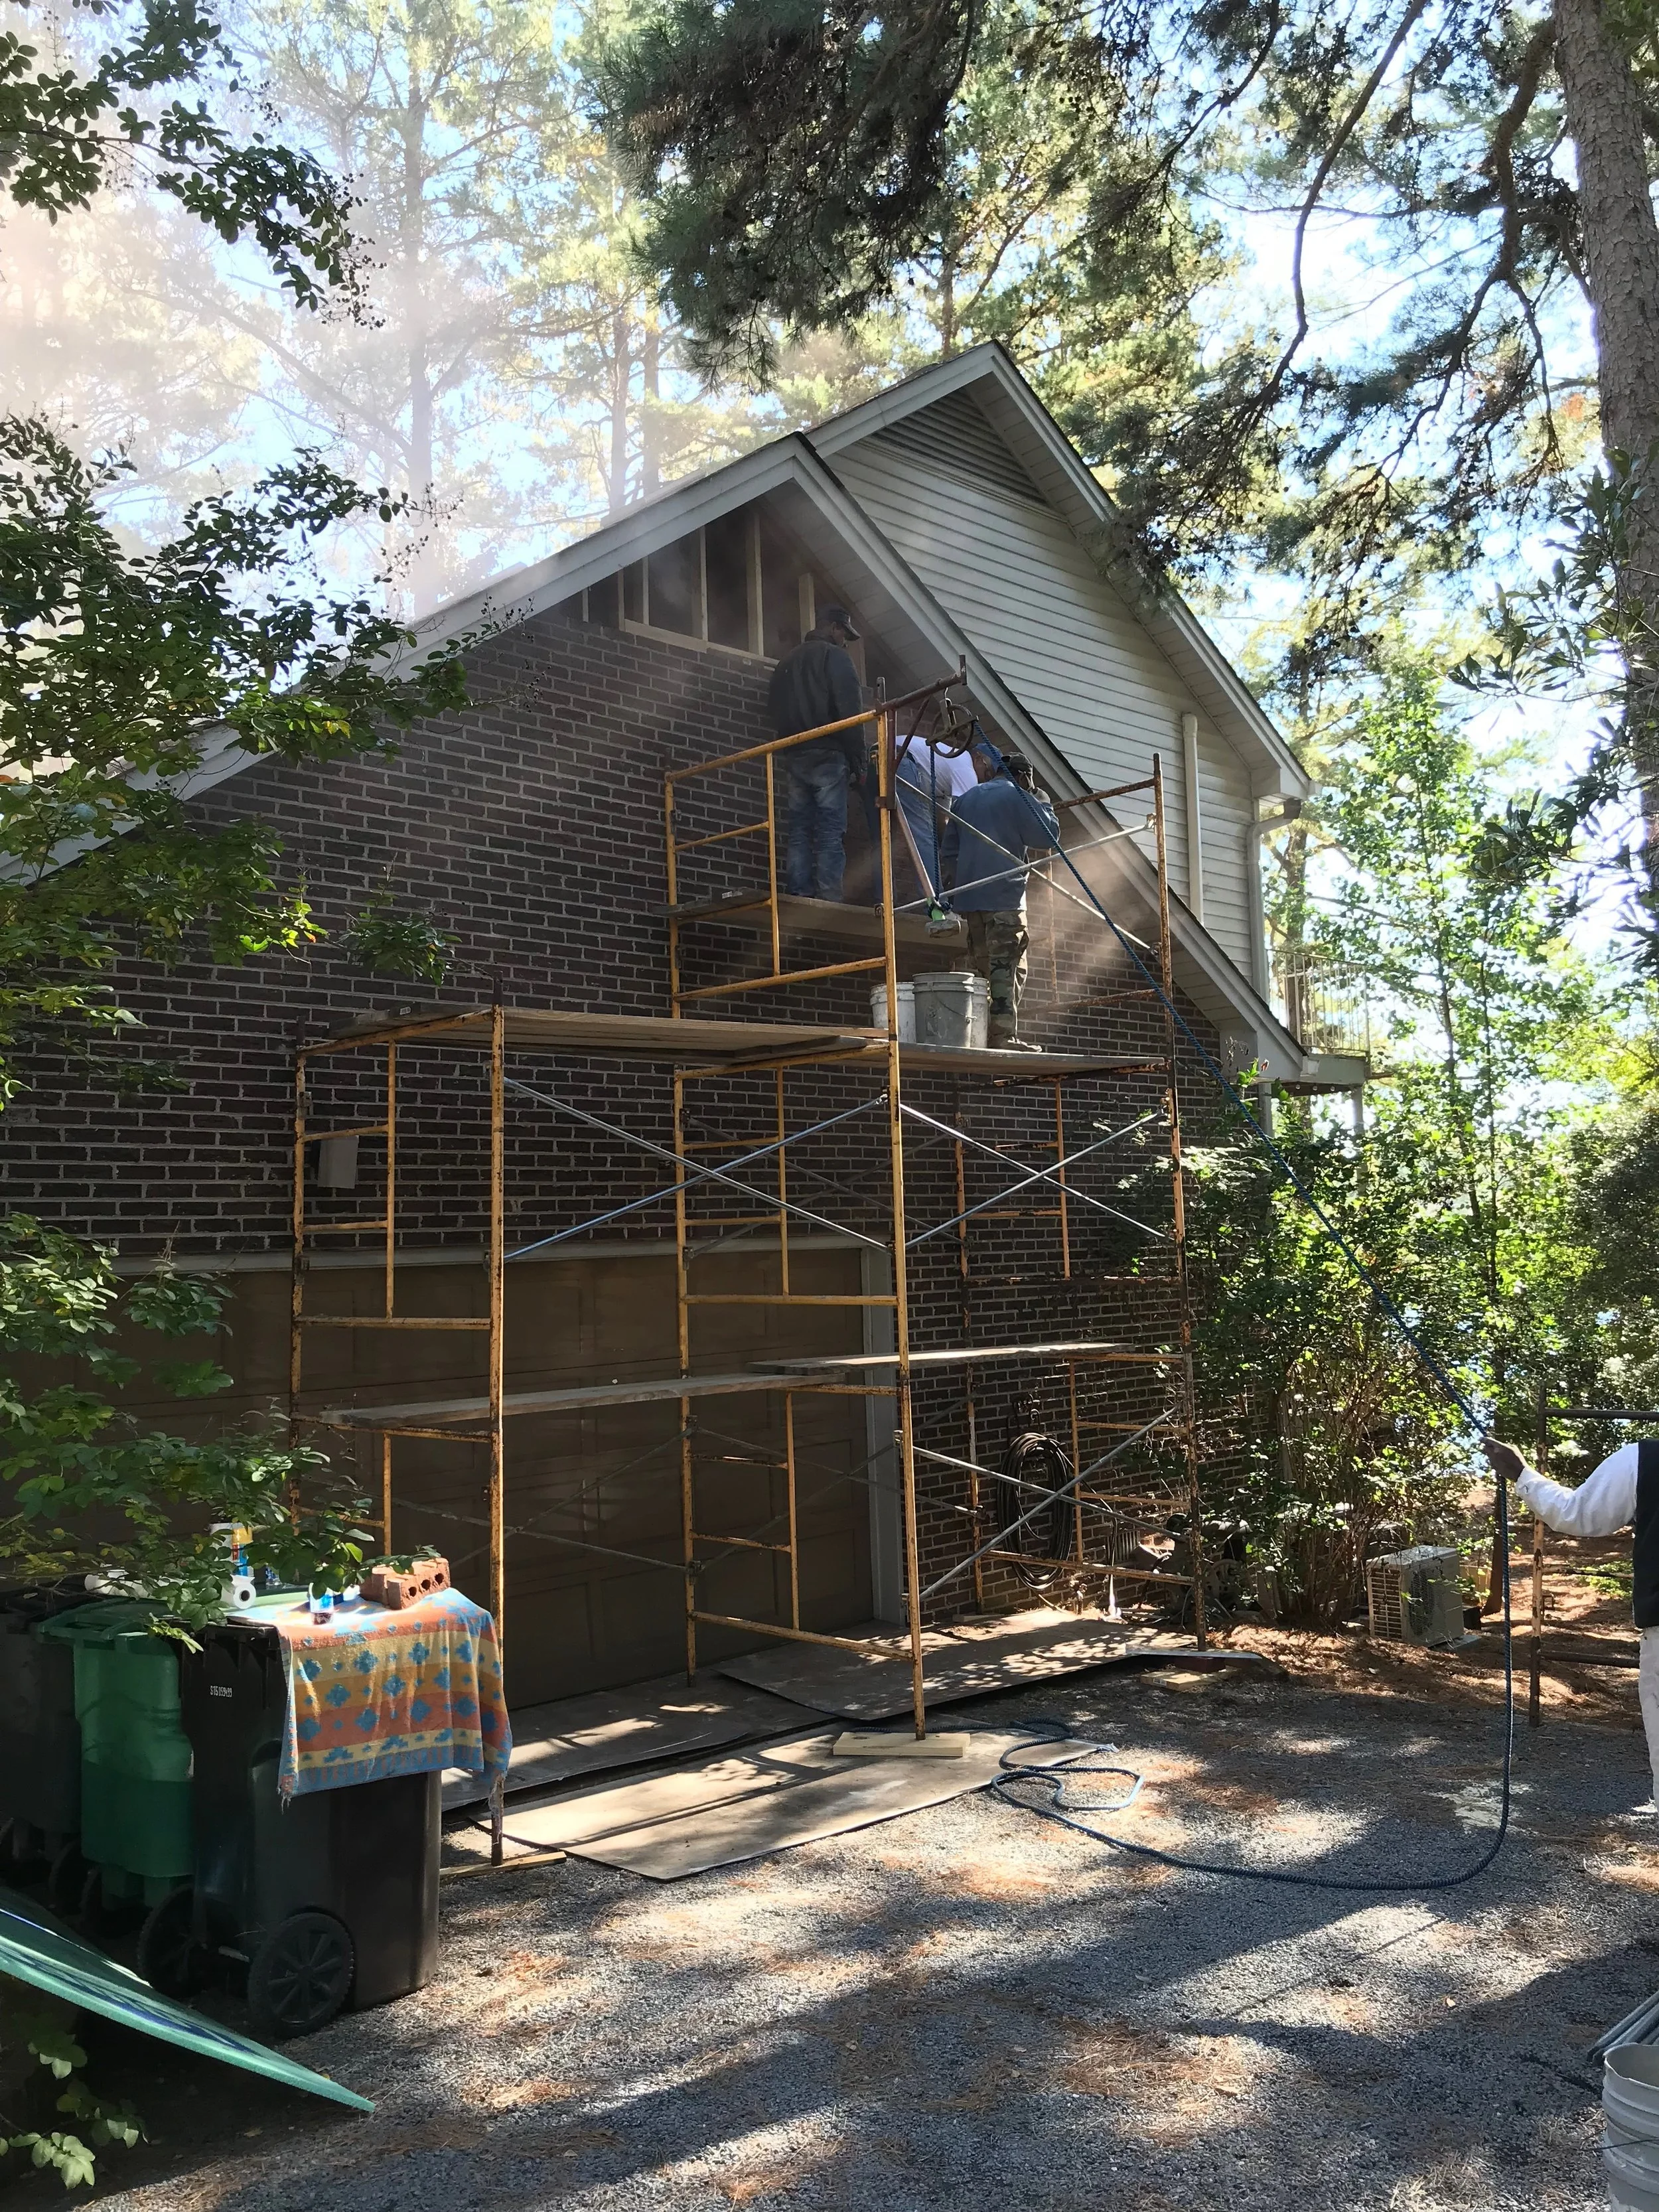
Professional mason and his crew cutting brick veneer for window opening. Lots of scaffolding required.
It goes without saying we then had to frame out a closet for the new bedroom area (as we sacrificed the original one for a new linen closet in the hallway), add insulation, install sheetrock on the walls and ceilings, and install / refinish matching hardwood flooring so it was cohesive space.

Saying goodbye to the unique skylights.

Framing out some walls in the unfinished attic space. We added a custom attic door for additional storage within the eaves.
The Design.
In terms of the bathroom finishes, we wanted to design something that was classic with both modern and retro touches—ultimately reflecting each of my parents' styles. Since we don't know when we will get around to updating the rest of the home (kitchen, master bath, guest bath, etc) we also wanted the bathroom to fit with the vibe of the rest of the home, but also work with future updates. A delicate balance.

Our tile selections for bathroom.

Work-in-progress herringbone tile floor.
We selected a carrara marble hexagon tile for both the shower floor and panoramic niche. We did 3 x 8 white subway tile (regal bianco gloss ceramic - now discontinued) for the shower walls all the way up to the ceiling. The bathroom floor was a little more expensive—both material and design-wise—a 3 x 12 bardiglio bianco porcelain tile in a herringbone pattern with a nero marquina black marble border.
Adding the black border around the herringbone pattern was a little complicated. We installed the herringbone first and then cut the tile with a grinder so that the herringbone pattern edges that meet the black border would be perfectly straight.

Cutting the herringbone with a grinder.
The budget for this bathroom was more flexible than our flips in the past so we could pick out more expensive finishes. We are very proud with how it turned out. It feels like a spa retreat and we find ourselves resisting using this bathroom instead of our existing one!

Floating vintage-looking sink with shelf for storage above.
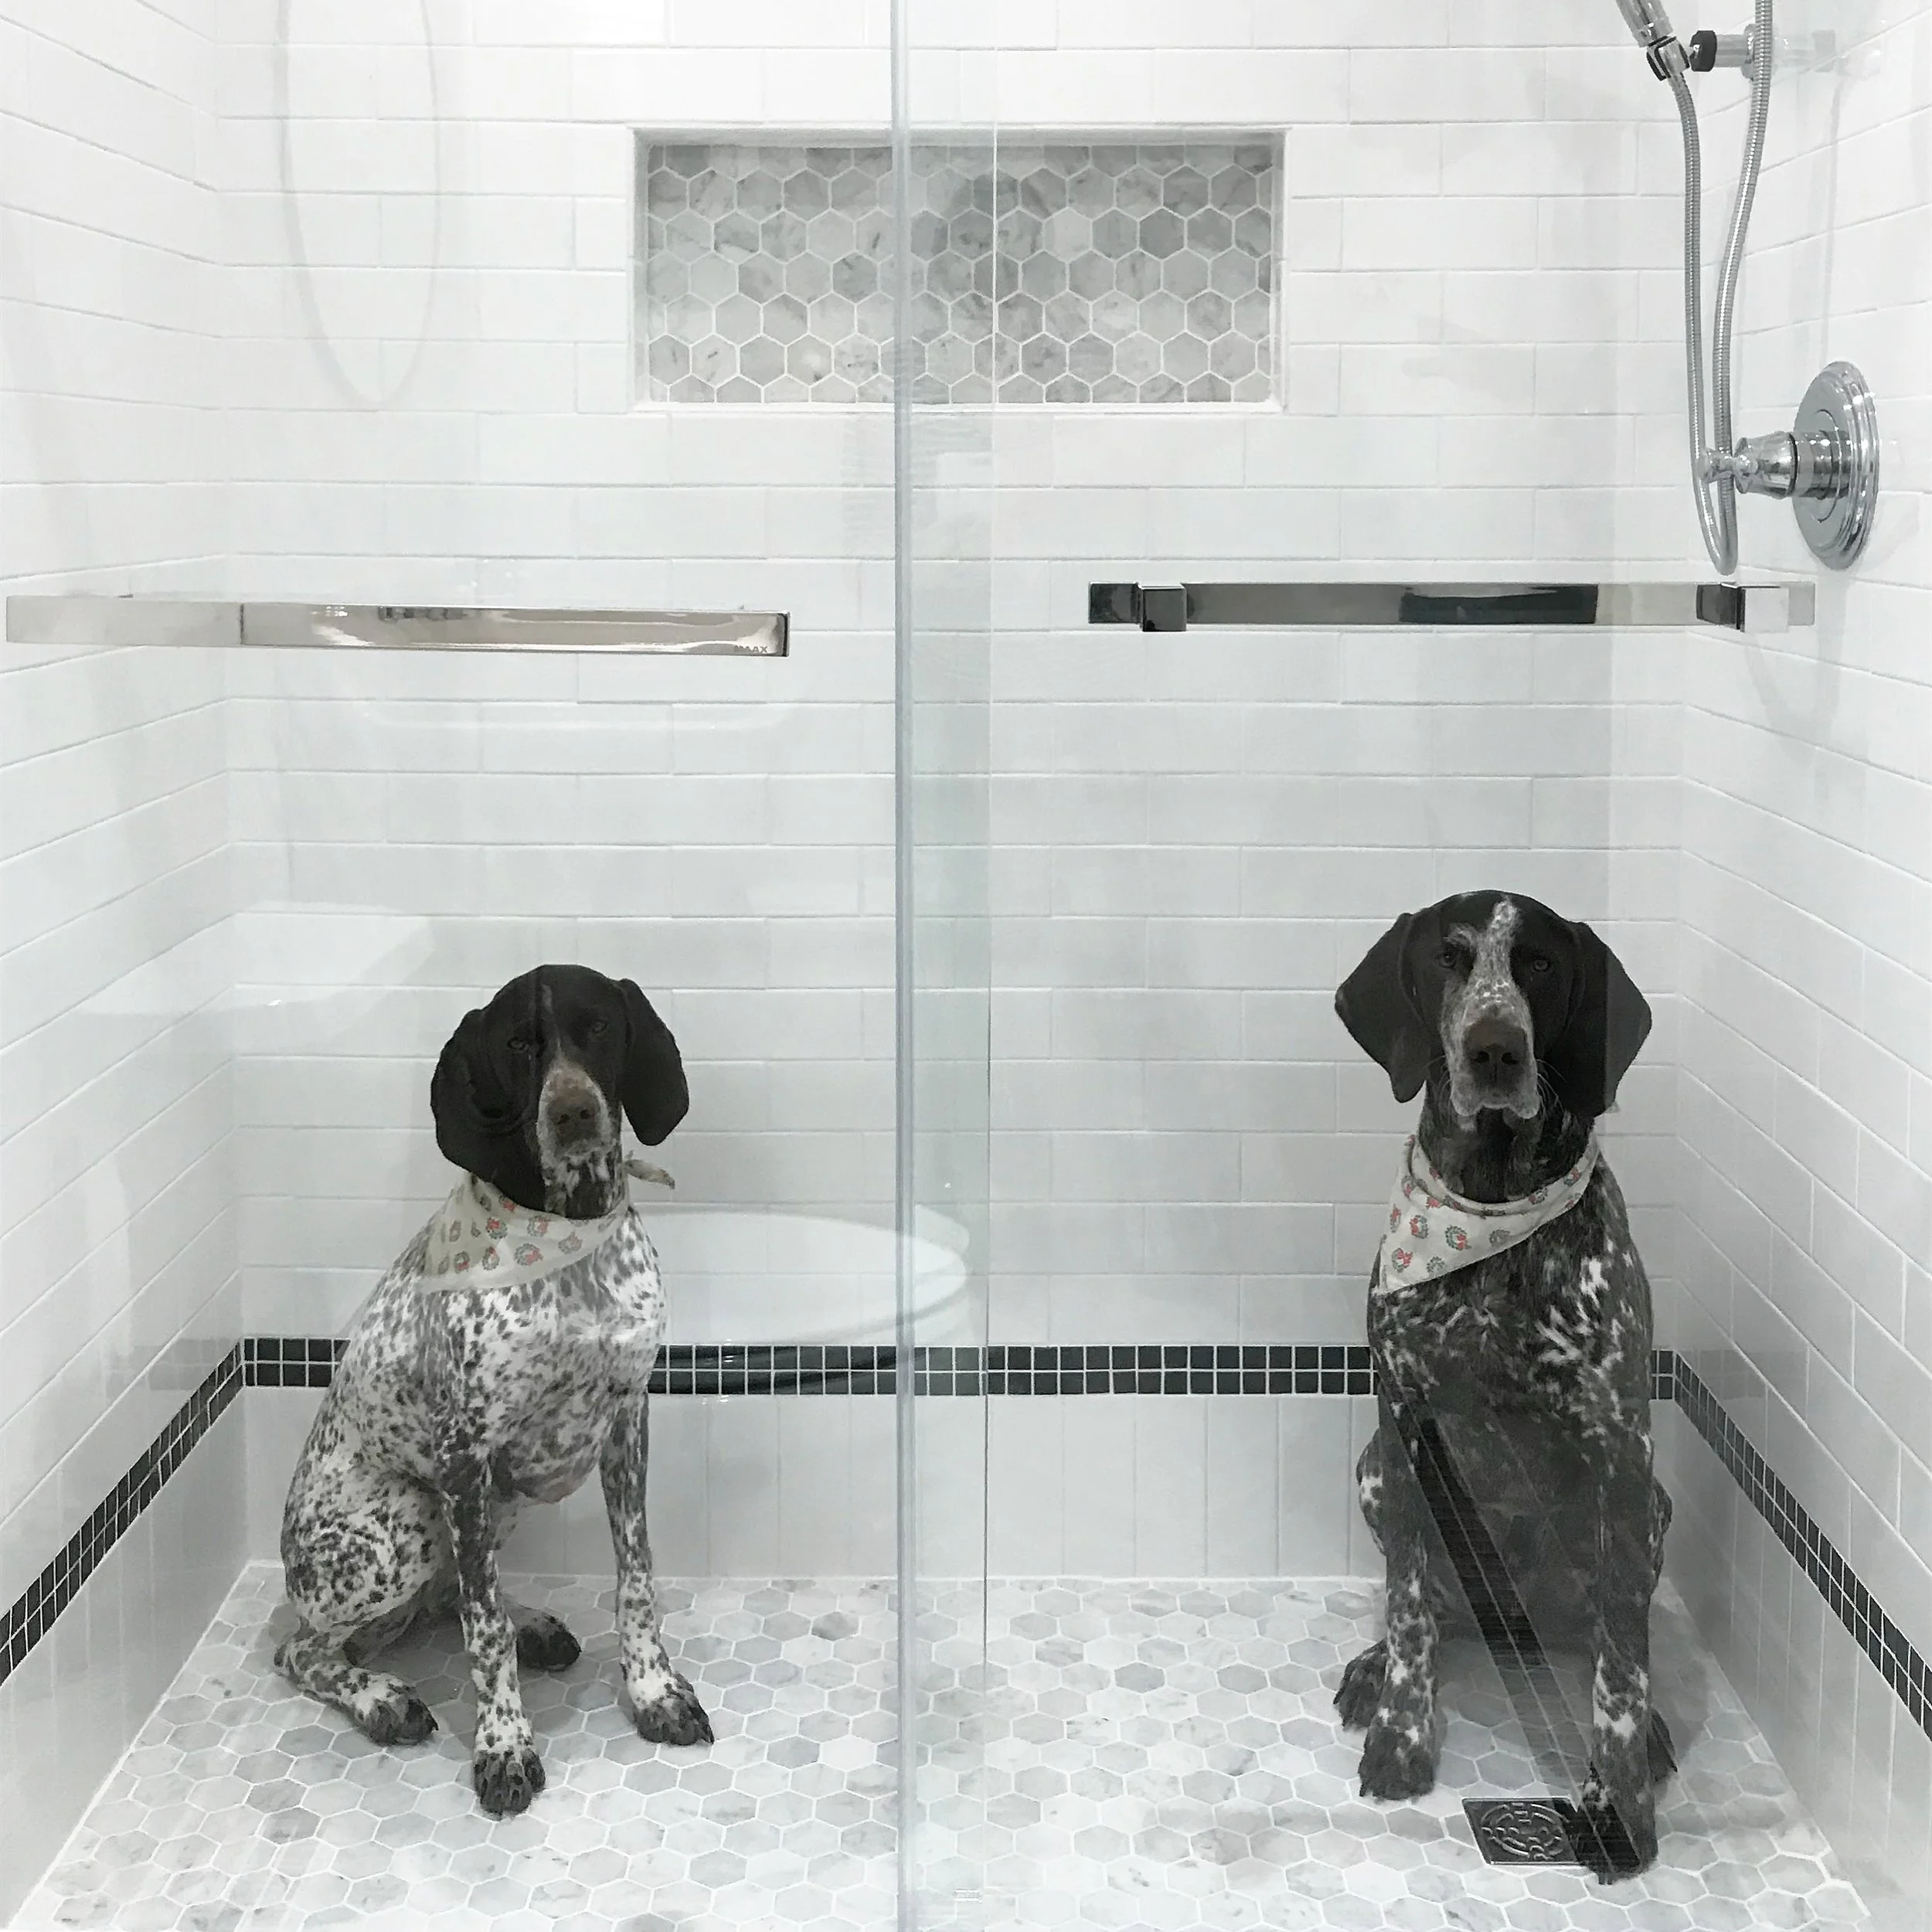
Our dogs were likely the subconscious coloring inspo for this bathroom.

Floor tile detail.

Panoramic shower niche detail.

We didn't move the skylights up so we wouldn't have to touch the roof. Instead, we created little niches for additional storage.
The Delays.
So of course in typical home renovation fashion, there were delays with the guest suite as a whole. The biggest delay was refinishing the hardwoods. This is something we could have tackled ourselves, but we were in the process of acquiring another flip, preparing for hosting Christmas in North Carolina, and also a baby on the way.
No one could get into our house to refinish the floors until after George's due date in mid January. I would be lying if I said this was the first meltdown I had for this renovation, but it definitely was the biggest. I would also be lying if I said my meltdowns were due to pregnancy hormones, but let's be honest, I have always been known to have a good old-fashioned renovation meltdown.
Basically George made a somewhat dramatic appearance a week earlier than expected and the flooring guys came in sometime afterwards. We moved the bedroom furniture in sometime after that. I wouldn't know exactly how it all went down because I completely blocked this part of the renovation out of my mind. Looks great though, haha!
We've had a few guests stay in the suite since and it's been so convenient and stress-free to be able to have separate bathrooms and living spaces especially while experiencing all the postpartum fun of having a newborn.

Lord help us this guest suite was going to be done before George arrived.

The refinished floors in all their glory after the arrival of George.
All-in-all we are really happy with how it turned out and our only complaint was that it was not completed on time. Jim really stepped it up and finished it a week after the flooring guys were done so we could start on another flip right away.

The reason this entire guest suite came to fruition.


